Spring is when you feel like whistling even with a shoe full of slush.

“Spring is when you feel like whistling even with a shoe full of slush.”  ~Doug Larson

As I write this, on April 4th, it is snowing.

Again.

I can’t believe it’s already April.  But I really can’t believe how long this winter has been.  Actually dreading the heating bill.

This time last year we were having a heat wave.  I was about to go on a weekend jaunt to The Peak District for my 30th birthday.  Now as I look to my 31st birthday next week, I stare out the window from my office at work, and think about what I should do on my birthday, all I can think is that I just want to stay at home, put on an old movie, eat cake and Easter eggs and pray that the spring will come sooner rather than later.

Boy, I don’t think I’ve ever opened a blog post that negatively before.  See?  Look what this rubbish weather is doing to me. Let’s try and perk things up a bit.

What do we have to look forward to?

Well . . . I can’t say too much, but hubby and I are working on a masterplan and this month we’ll be working towards that even more – so that’s exciting.  Keeping you in suspence am I?  Well, watch this space.

Cupcakes

This weekend, I’m going to be baking lots and lots of cupcakes for my work colleagues (we bring in cakes for our birthdays).  So that will give me the opportunity to go wild with designs and lots of florist paste flowers!

Small-Space-Laundry-Organization

Organising

I really want to sort out the house.  I’ve been saying it for as long as I have been writing this blog, but I want organised jars with pretty stickers, lovely cupboards with everything facing the same way, no clutter in the spare room, no junk drawers, my bedroom drawers to actually close, just all the normal things really.  I’m going to try.  Very hard.  Will start again, this month.  I have the jars, and the stickers – so I’m getting closer!

Great British Beef Week
21-27 April 2013

As if I need an excuse to tuck into a big chunk of beef.  But, I’ll be supporting this week without fail.  Boeuf Bourgignon anyone?

DSC_0040

National Gardening Week
15-21 April 2013
In the hope that spring will be here by then, it will be lovely to celebrate by planting some colour into the garden and getting everything ready for summer. Bring on the sun. I even have a new garden stool to use to save my knees from hurting. I’m getting on a bit aren’t I?

Spring Hopes

As the snow seems to be getting heavier, what other inspirational springtime thoughts can we have?

  • The hope of bright sunshine for a few days in a row
  • April showers and that rain smell
  • Baby lambs hopping around the fields
  • The first spring flowers and being able to garden again
  • Waking up to birdsong
  • Putting away the winter woolies and replacing them with cardies and floral dresses
  • Spring cleaning and filling the home with fresh air
  • Taking a walk amongst the blossom
  • A spring drive and sunday Roast Lamb lunch
  • Spring vegatables . . . yum!

Paul Hollywood’s easy white bread

white bread retouched1

The History

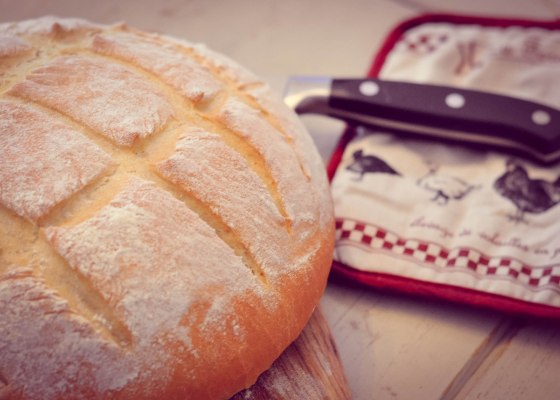
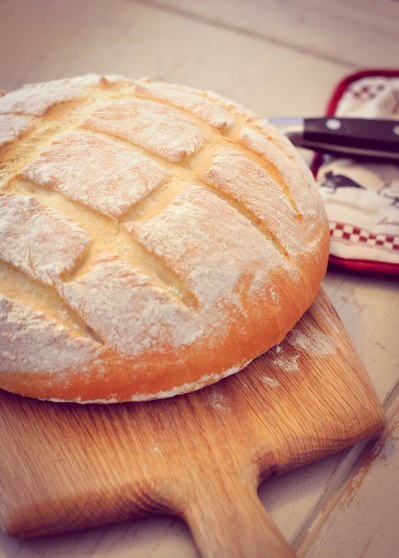
Now, Paul Hollywood refers to his bread as a Cob which is apparently a term used in the Midlands, likely due to the resemblance to a Cobblestone!  I couldn’t really find much about the history of the Cob loaf.  So I looked into the history of bread . . .

Now, you can imagine, a lot came up about that.  And to be honest, I’ll be here all day if I went into that much detail about it.  But if you’re really that interested, I have found the most amazing website which details the history of bread from the present, all the way back to 8000 BC.  So check out www.bakersfederation.org.uk – it’s rather impressive!

__________________________________________________________

My Experience

I thoroughly enjoyed making this bread.  It was my first time making bread like this.  I found it, almost therapeutic. 

I loved watching the dough rise.  I loved the kneading.  I loved the smell of it baking.

And it was so easy.  AND CHEAP!!! A loaf this big would probably cost you £1.50 or so in the supermarket, but it cost me pennies to make.

I highly recommend making this loaf.  You can’t go wrong.  And your family will be so impressed.

To aid the ease, especially if you’re a bread baking novice like me, check out Paul Hollywood’s how to video here.

white bread retouched2

white bread retouched4

__________________________________________________________

The Recipe

Over 2 hours preparation time

30 mins to 1 hour cooking time

Makes 1 loaf

Ingredients

  • 500g/1lb 1oz strong white bread flour, plus a little extra flour for finishing
  • 40g/1½oz soft butter
  • 12g/2 sachets fast-action dried yeast
  • 2 tsp salt
  • about 300ml/10¾fl oz tepid water (warm not cold – about body temperature)
  • a little olive or sunflower oil

Preparation method

  1. Put the flour into a large mixing bowl and add the butter. Add the yeast at one side of the bowl and add the salt at the other, otherwise the salt will kill the yeast. Stir all the ingredients with a spoon to combine.
  2. Add half of the water and turn the mixture round with your fingers. Continue to add water a little at a time, combining well, until you’ve picked up all of the flour from the sides of the bowl. You may not need to add all of the water, or you may need to add a little more – you want a dough that is well combined and soft, but not sticky or soggy. Mix with your fingers to make sure all of the ingredients are combined and use the mixture to clean the inside of the bowl. Keep going until the mixture forms a rough dough.
  3. Use about a teaspoon of oil to lightly grease a clean work surface (using oil instead of flour will keep the texture of the dough consistent). Turn out your dough onto the greased work surface (make sure you have plenty of space).
  4. Fold the far edge of the dough into the middle of the dough, then turn the dough by 45 degrees and repeat. Do this several times until the dough is very lightly coated all over in olive oil.
  5. Now use your hands to knead the dough: push the dough out in one direction with the heel of your hand, then fold it back on itself. Turn the dough by 90 degrees and repeat. Kneading in this way stretches the gluten and makes the dough elastic. Do this for about 4 or 5 minutes until the dough is smooth and stretchy. Work quickly so that the mixture doesn’t stick to your hands – if it does get too sticky you can add a little flour to your hands.
  6. Clean and lightly oil your mixing bowl and put the dough back into it. Cover with a damp tea towel or lightly oiled cling film and set it aside to prove. This gives the yeast time to work: the dough should double in size. This should take around one hour, but will vary depending on the temperature of your room (don’t put the bowl in a hot place or the yeast will work too quickly).
  7. Line a baking tray with baking or silicone paper (not greaseproof).
  8. Once the dough has doubled in size scrape it out of the bowl to shape it. The texture should be bouncy and shiny. Turn it out onto a lightly floured surface and knock it back by kneading it firmly to ‘knock’ out the air. Use your hand to roll the dough up, then turn by 45 degrees and roll it up again. Repeat several times. Gently turn and smooth the dough into a round loaf shape.
  9. Place the loaf onto the lined baking tray, cover with a tea towel or lightly oiled cling film and leave to prove until it’s doubled in size. This will take about an hour, but may be quicker or slower depending on how warm your kitchen is.
  10. Preheat the oven to 220C (200C fan assisted)/425F/Gas 7. Put an old, empty roasting tin into the bottom of the oven.
  11. After an hour the loaf should have proved (risen again). Sprinkle some flour on top and very gently rub it in. Use a large, sharp knife to make shallow cuts (about 1cm/½in deep) across the top of the loaf to create a diamond pattern.
  12. Put the loaf (on its baking tray) into the middle of the oven. Pour cold water into the empty roasting tray at the bottom of the oven just before you shut the door – this creates steam which helps the loaf develop a crisp and shiny crust.
  13. Bake the loaf for about 30 minutes.
  14. The loaf is cooked when it’s risen and golden. To check, take it out of the oven and tap it gently underneath – it should sound hollow. Turn onto a wire rack to cool.

Recipe courtesy of bbc

white bread retouched3

__________________________________________________________

The Taste

Although it had the hollow knocking sound when I took it out of the oven, and although it came out crusty, it did go soft, and I think it was under baked.  I think a bit longer would have made it perfect.

My only other complaint is that, for me, it was much too salty.  So I would recommend only 1tsp of salt.

Other than that, my family were impressed with my first effort a t cob.  I think it looks rather lovely really . . .

white bread retouched5